Connecting an email address to a Gmail account
You are able to connect your email address to a Gmail account, below are the steps to take to achieve this.
Step 1
Log into your Gmail account. Click on the "Settings Cog" in the upper-right corner of the screen and go to Settings.

Step 2
On the settings page click on the Accounts heading.

Step 3
Go to Check mail from other accounts and click on the link Add a mail account.
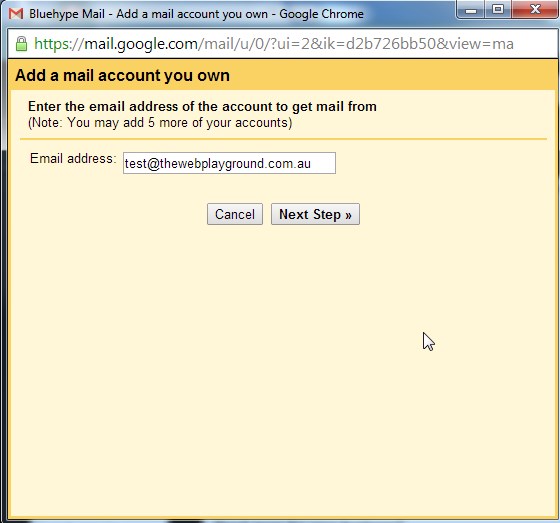
Step 4
Once you click on the Add a mail account a popup box will appear where you will add the email address of the account to get mail from.
Step 5
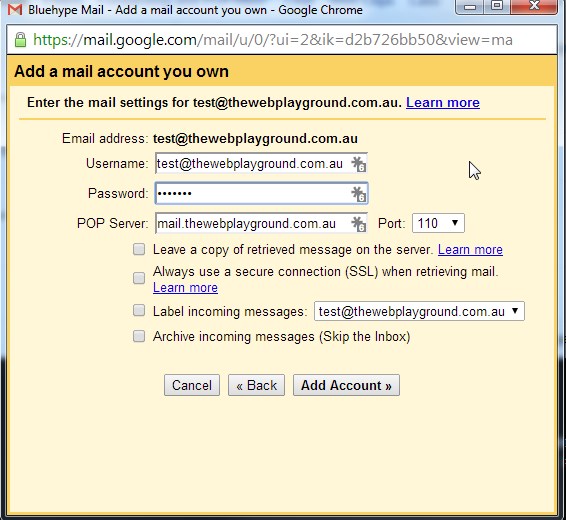
Click Next Step and on the next box and fill out the fields. Below is an explanation of what the fields are:
- Username: This is the email address.
- Password: This is the password of the email address.
- POP Server and Port number: Leave this as the default values already there. If there happens to be no entries the POP Sever will be mail.[domain name] and the Port 110. This is shown in the image below.
- Tick box option Leave a copy of retrieved message on the server: Leave this unticked as you want Gmail to delete the email of the webmail server once the email has been downloaded to Gmail. This will not delete the email out of Gmail.
- Always use a secure connection (SSL) when retrieving mail: Leave this unticked we do not need to use an SSL connection.
- Label incoming messages: If you have created labels within the Gmail account you can assign a label to the emails that come through from the account. This can be useful if you have multiple email accounts connecting to your Gmail account. Leave this unticked if you don't want any labels connected to the emails.
- Archive incoming messages (Skip the Inbox): If this is ticked all your emails will go to archive instead of going into the inbox.
- Once this is done click on Add Account.
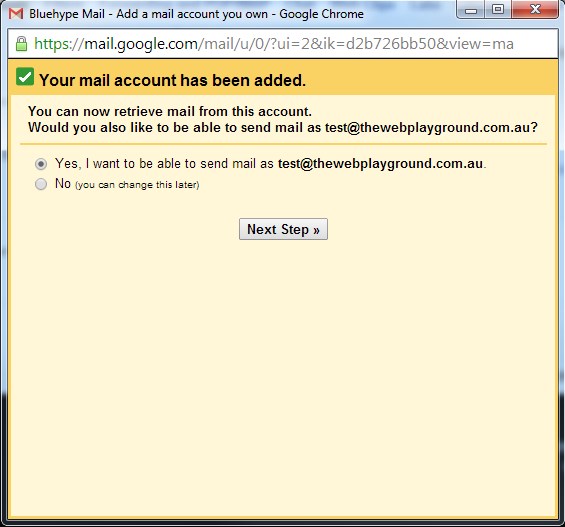
Step 6
The account will now be added to Gmail. If you want to be able to send emails as the email address select yes and click on Next Step.
Step 7
Add your name and select whether you want to treat the email address as an alias. You can learn more about this feature from the link in the box.

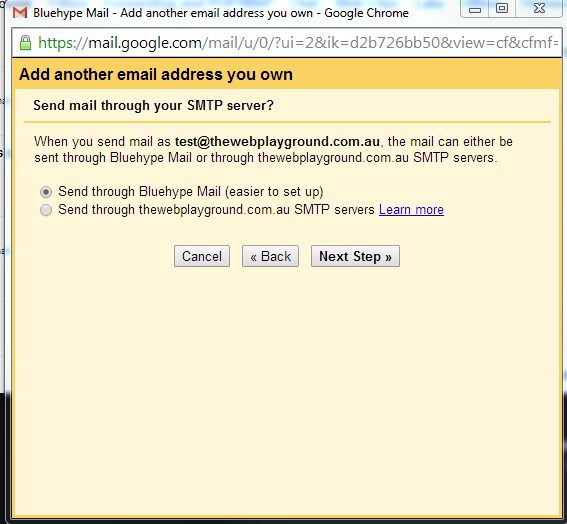
Step 8
Send the mail through the gmail servers which is the first option and click Next.
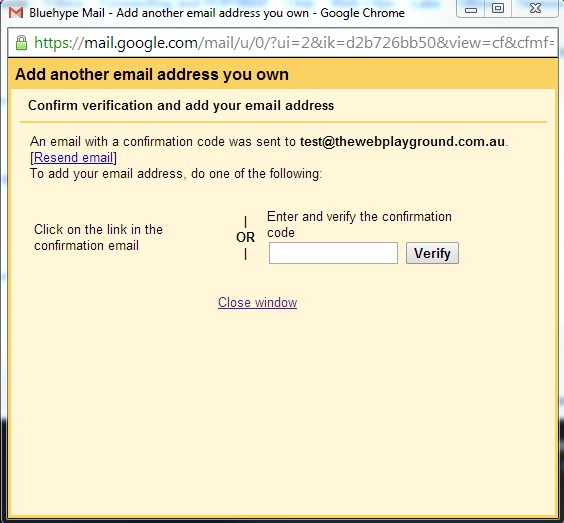
Step 9
A verification email is sent to the email address with a way to verify that you have control of the email address. Click on the Send Verification button and then log into webmail of your email address to view the email. The email will have a verification code with numbers.
Step 10
Add the verification code to the text box and that is it.