2 Step Authentication
Online security these days is more important than ever. We take the security of your website very seriously as I am sure you do as well. Afterall it is the face of your business online.
Within The Web Console (your website CMS) you have the ability to update your password and set up 2 Step Verification (Also known as 2 Factor Authentication (2FA) or Multi – Factor)
Setting up 2 Step Verification removes additional risks associated with compromised passwords. If a password is hacked, guessed, or even phished, that is no longer enough to give an intruder access without the addition of entering a code provided by the 2 Step Verification process. (Set up prior)
We highly recommend that you change your web console password on a regular basis AND set up 2-Step Verification.
Here is instruction on how to do both;
Login to The Web Console as normal
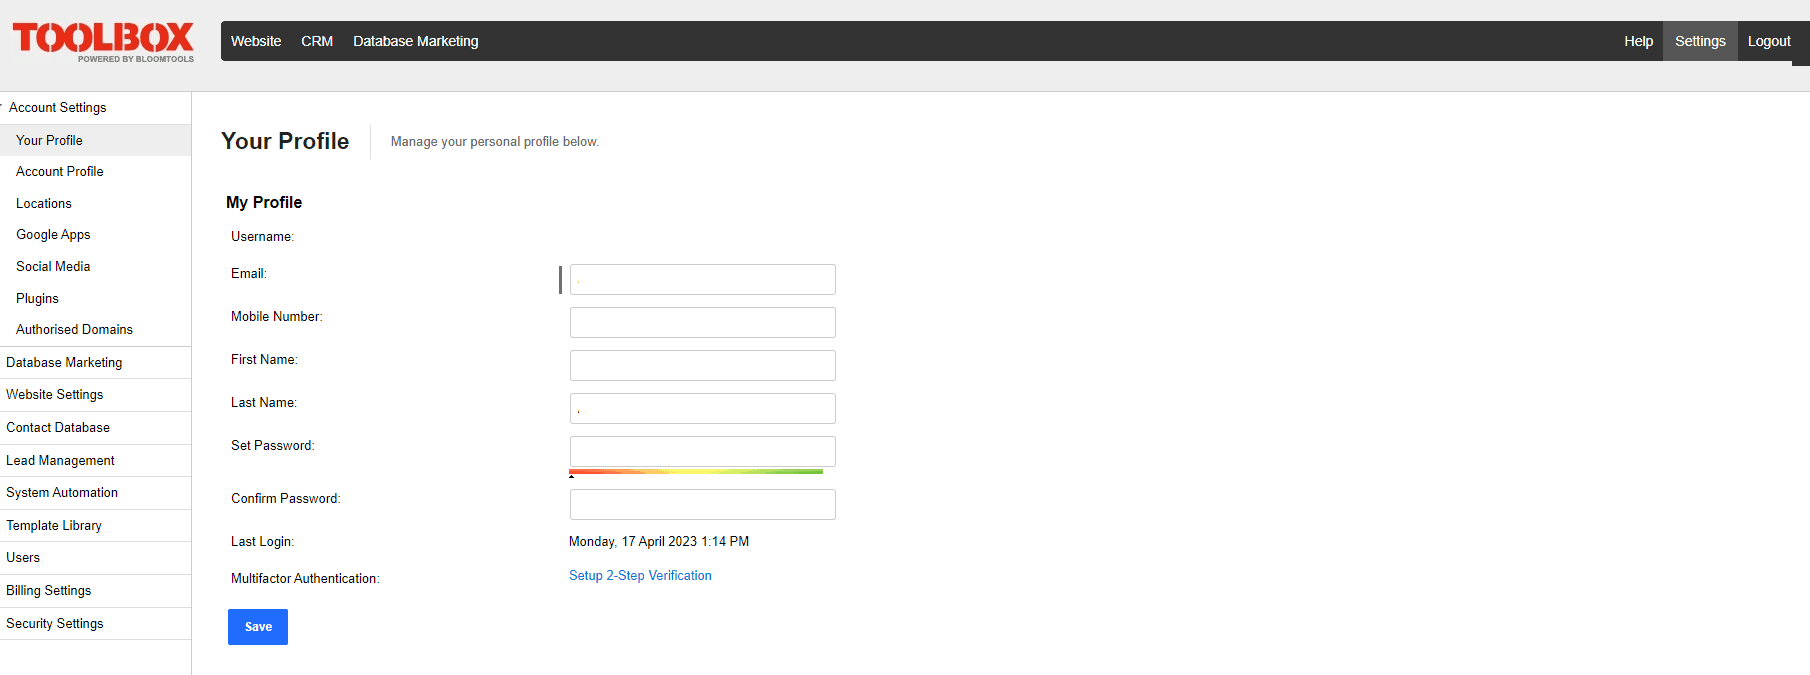
Navigate to Settings (Top right) and then Account Settings (left menu) and then Your Profile.

Your details will be there
Password
Your current password will not be visible as we do not keep a record of passwords
To change password simply enter a new password in Set Password and then repeat it again in Confirm Password
For passwords we recommend a mixture of upper and lower case plus numbers or even a phrase/short sentence
THEN CLICK SAVE
The password will still not be visible so make sure it is something you remember or keep in a password vault (like LastPass)
2 Step Verification
On the same page click on Set Up 2 Set Verification
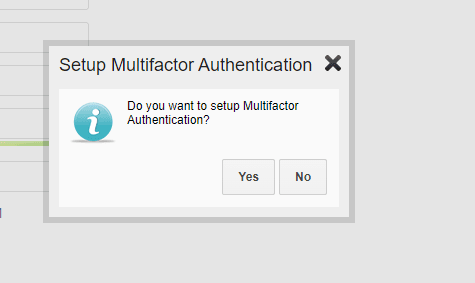
A pop up will appear asking “Do you want to set up Multi-Factor Authentication?”

Select Yes
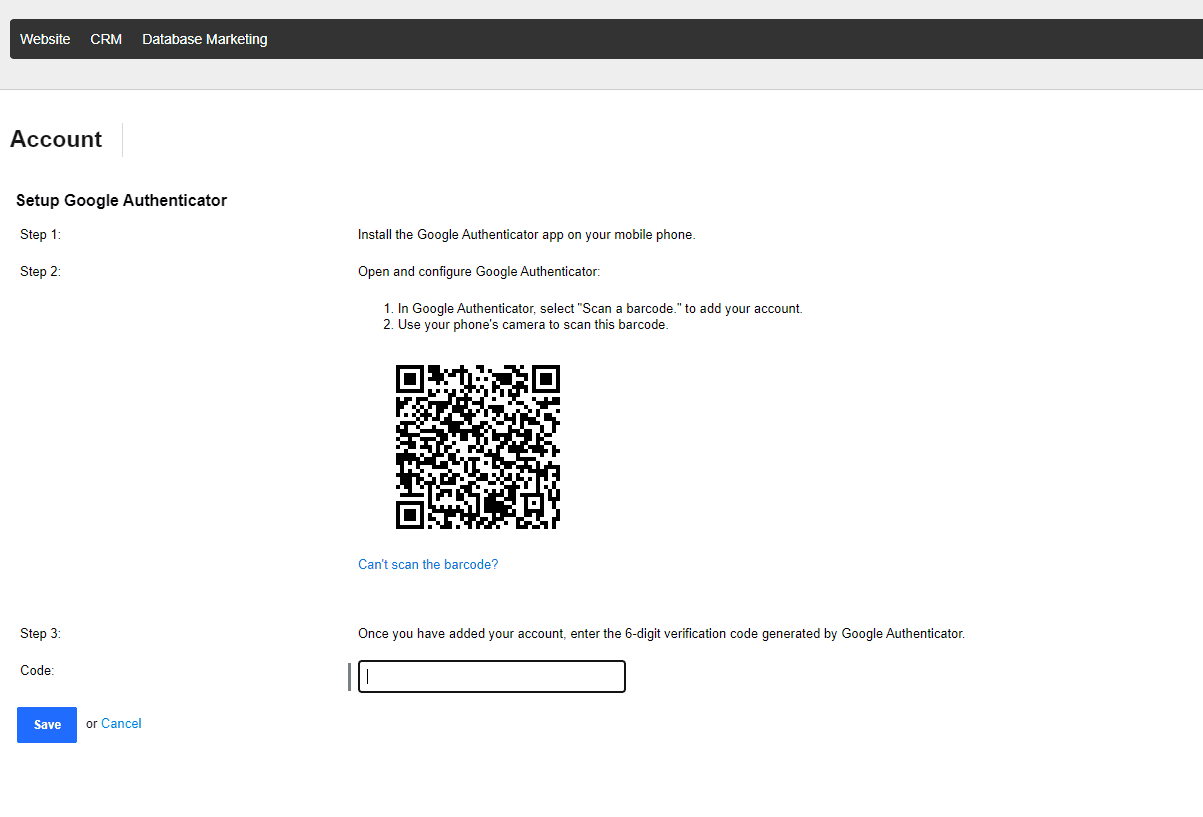
Follow the instructions on the page

Google Authenticator App icon looks like this

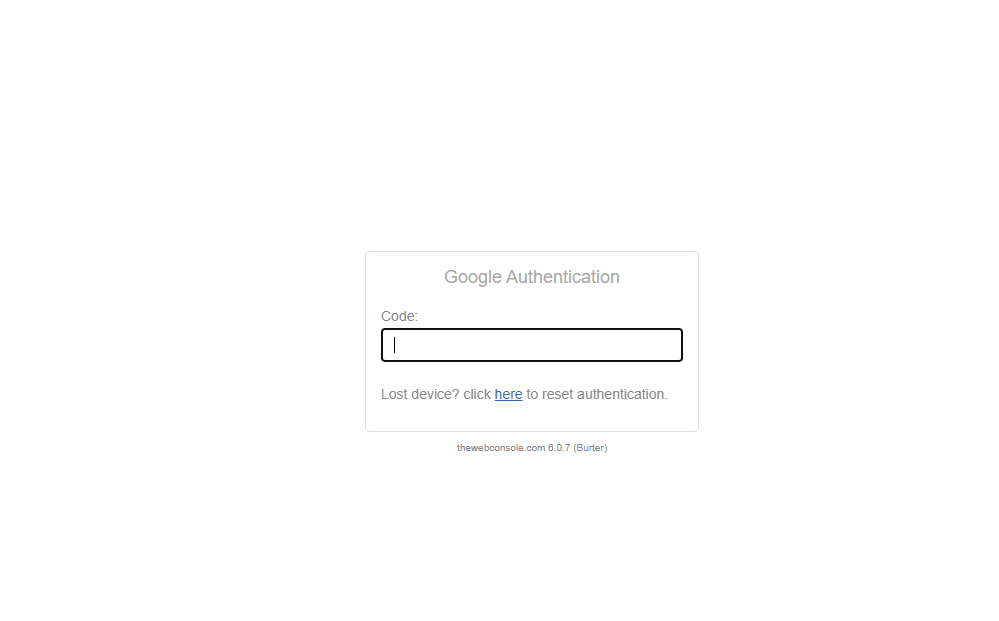
Once complete logout of The Web Console and then login again with your user name and your new password. It will then show a new screen like this:

Go to the Authenticator App on your phone and it will display TheWebConsole (with your user name in brackets) and a code below
Enter this code
